System Setup
Now that the system is powered up, you're introduced the the Secure Lockdown PlayBox™ - Browser Edition configuration utility. Here, you will have access to set up general system and remote management settings and fully configure Chrome lock-down settings to suit your needs. Typical setup takes under 10 minutes.
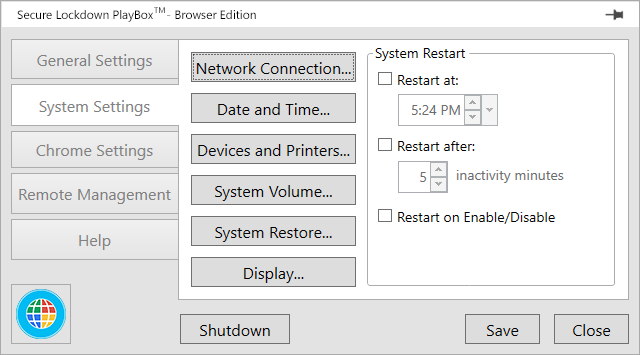
The first screen you'll be introduced to when the utility launches is System Setup. Here you can configure all aspects of the system including: the display, date and time, network connectivity, devices and printers, volume, system restart, system restore, and Chrome maintenance. Since the PlayBox's operating system is Windows 10, the system setup dialogs will likely be familiar to you.
For easy accessibility, there are 4 button options always available while the PlayBox is disabled: the Browser button, which allows you to launch the browser at any time; the Shutdown button, which allows you to turn off the device; the Save button, which allows you to save any unsaved changes made within the utility; and the Enable button, which allows you to enable the PlayBox once it has been configured to your needs.
Note: You can easily access this user guide at any time by selecting the utility's Help tab, then choose the Online User Guide... button.
Display Settings
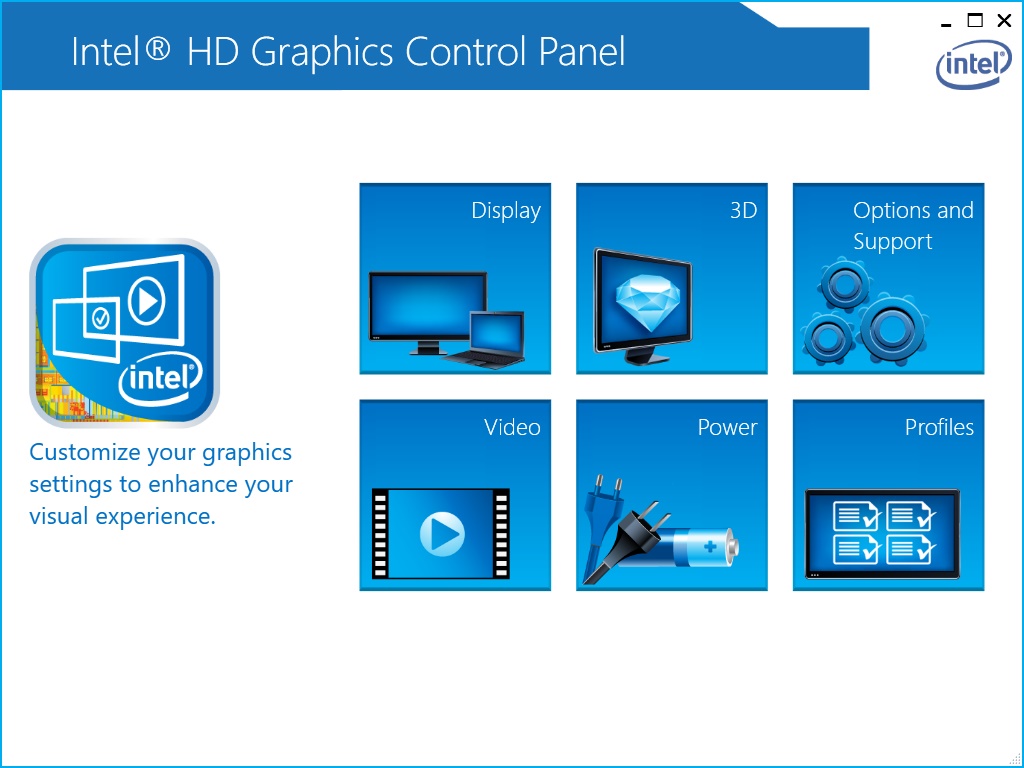
To optimally present your content, your PlayBox display settings should reflect the desired resolution of your display (for example: 1080p). The PlayBox will automatically sense the output of your display's recommended resolution and match it. If you wish to modify the resolution, you can do so using the PlayBox Display settings feature. To change the screen resolution, follow the steps below:
- Press the Display... button from the System Setup screen
- Press the Display button from the Intel HD Graphics Control Panel screen
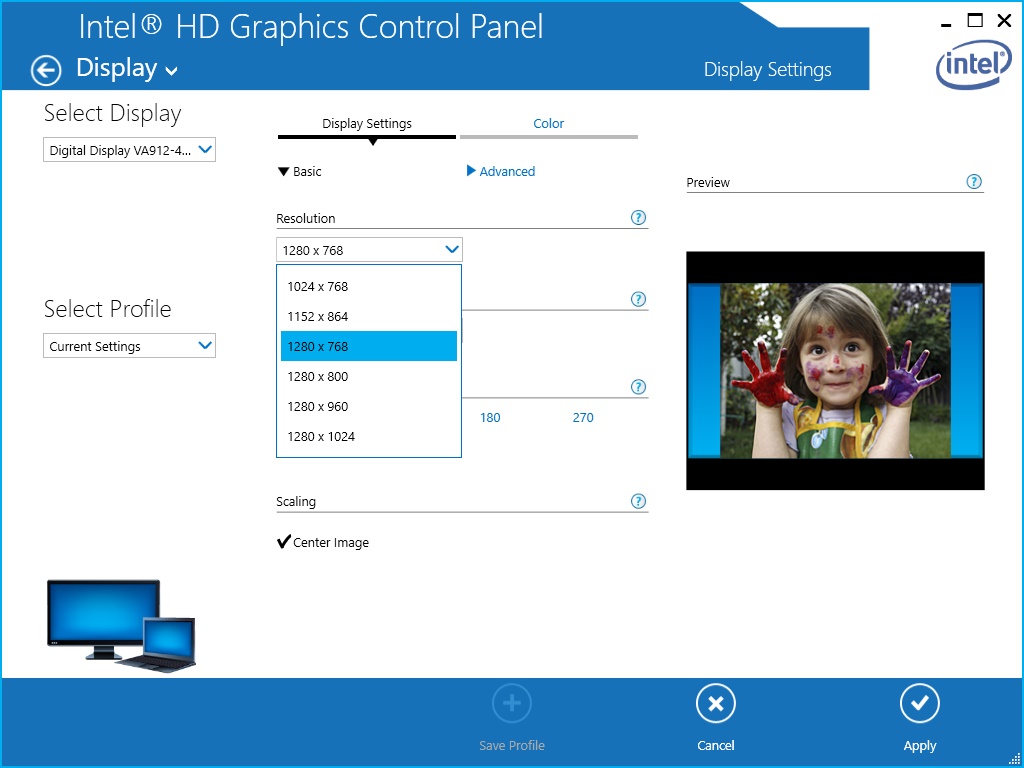
- Under the Display Settings > Resolution dropdown, choose the resolution that matches the optimal output of your display. Typically the optimal setting is already chosen by default.
- Under the Display Settings > Refresh Rate dropdown, choose the refresh rate that is optimal for the display. Typically the optimal setting is already chosen by default.
- Adjust any other settings you see fit, then press the Apply button to apply the changes and close the Display dialog
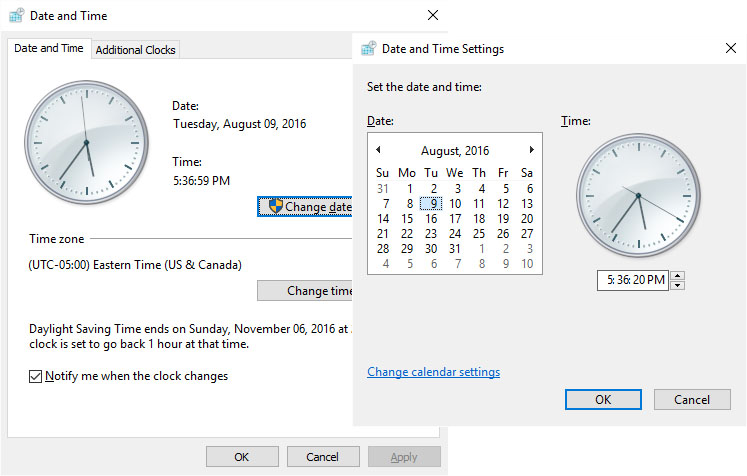
Date and Time Settings
Ensure the system clock is correct for your time zone by adjusting the Date and Time settings.
- Press the Date and Time... button from the System Setup screen
- Press Change time zone... button, then adjust the time zone to your area and select the OK button to apply the changes and close the dialog.
- Be sure that the date and time are accurate to your time zone
- Press the OK button to return to the System Setup screen
Network Connection Settings
The PlayBox has built-in both Ethernet (LAN) and WiFi network adapters. Inteset recommends using the Ethernet adapter over WiFi if possible as Ethernet has better throughput and more robust connectivity in comparison. However, if WiFi is a requirement, the PlayBox is equipped to handle most WiFi standards including 802.11 b/g/n and has excellent WiFi reception.
The following steps assume that the network to which the PlayBox is connected has Internet accessibility. If using Ethernet, it is assumed that an Ethernet cable is connected to the LAN port of the PlayBox.
Note the PlayBox is already configure for DHCP networks whereby your connection to the network should already be establish. If DHCP is not available, you'll need to create a static network connection (recommended). Follow the steps below to enable and configure either the Ethernet or WiFi network adapter:
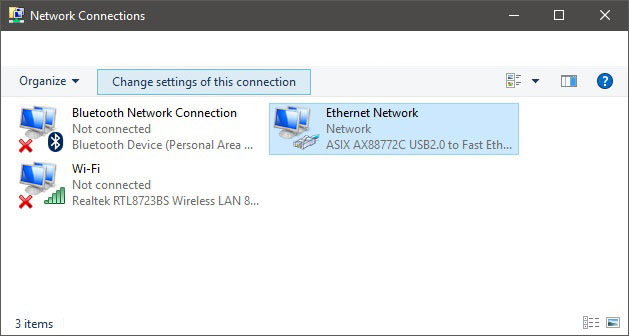
- Press the Network Connection... button from the System Setup screen
- Depending on which network adapter type is used, the one not used should be disabled to reduce unneeded overhead. You can disable a connection option by selecting it, then choose the Disable this network device option in the grey menu.
- Select the WiFi Network or Ethernet Network connection item
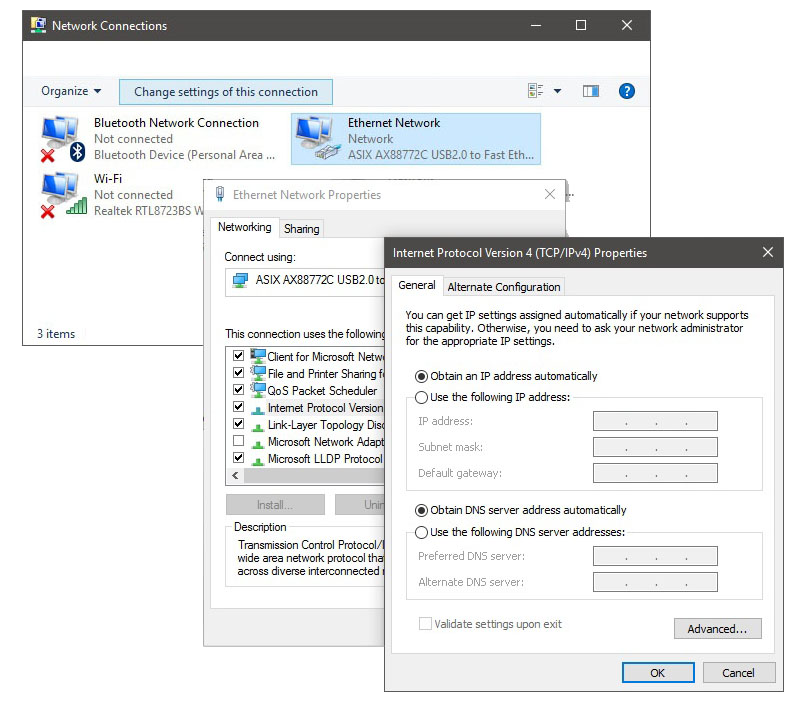
- Choose the Change Settings of this connection option in the grey menu bar. The WiFi or Ethernet Network Properties dialog will be displayed.
- Find and select the Internet Protocol Version 4 (TCP/IPv4) connection item, then press the Properties button. The Internet Protocol Version 4 Properties dialog will be displayed.
- By default, the Obtain an IP address automatically option is chosen (DHCP). If you want to statically assign the the IP address, choose the Use the following IP address option instead, then enter the network information required.
- Press the OK button once the screen is configured to your needs
Connect to a WiFi Network
Once a WiFi network adapter is configured, you'll need to establish a connection. Connecting to it only requires the WiFi password. To connect to your WiFi network, follow the steps below:
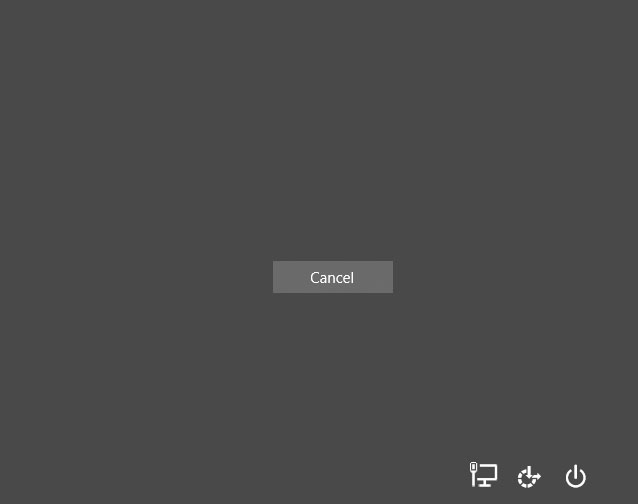
- Press the Ctrl+Alt+Del key sequence
- Press the Network icon in the bottom right corner of the screen. The Networks options fly-out will appear.
- Choose the WiFi network you want to connect to by selecting its name. You'll notice the Connect dialog will appear prompting you to connect to the network. You can also specify the option to connect automatically.
- Once the Connect button is pressed, if it is a secure network, you'll be prompted to enter the network security key. Enter the key, then press the Next button. The connection will be verified.
- Press the Cancel button to return to the PlayBox configuration utility
Note: Modifying WiFi networks will not be available when the PlayBox is enabled (locked down).

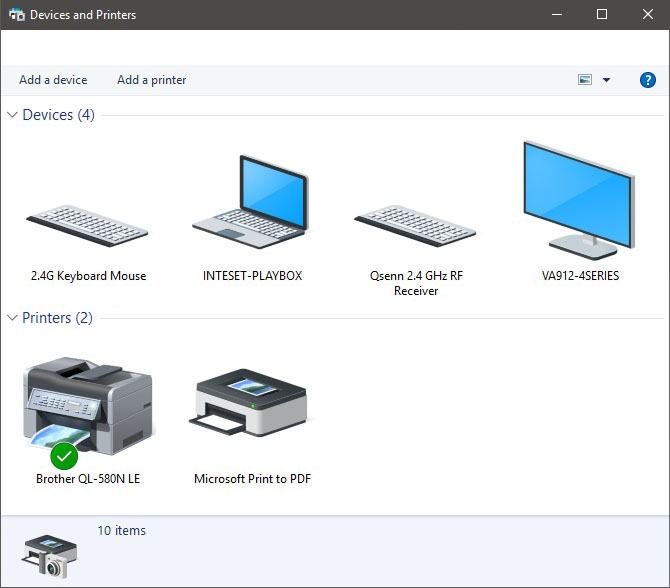
Devices and Printers Settings
The PlayBox allows you to connect any number of USB or Bluetooth devices including, but not limited to, printers, keyboards, mouse, scanners, barcode readers, speakers, microphones, USB hubs and many more. Most USB-based devices do not need configuration once plugged in. Bluetooth devices may need to be paired. Either way, you can use the Devices and Printers feature to add and configure USB and Bluetooth devices.
- Press the Devides and Printers... button from the System Setup screen
- If adding a USB device, plug the USB cable into the PlayBox (or a USB hub connected to the PlayBox)
- The USB device should display in a few seconds. If the device allows configuration, you can then configure the newly added device by selecting it, then press the associated option in the grey menu bar (ie: "Print server properties").
- If your adding a Bluetooth device, be sure the device is set to paring mode, then select the Add a device option in the grey menu bar. The Add a device dialog will appear and immediately begin searching for your device.
- Once found, choose item, then the Next button to pair and configure the device
Note: If you wish to remove a device, from the Devices and Printers screen, select the device to remove, then choose Remove device within the grey menu bar.
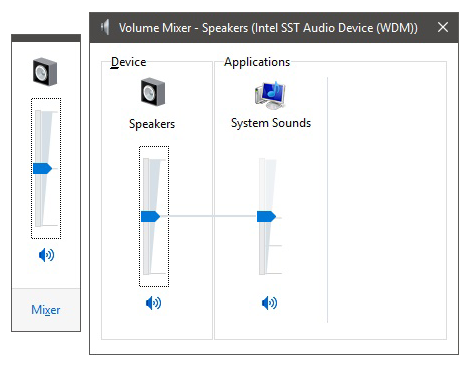
System Volume Settings
Set the volume level using the PlayBox volume controls. It is recommended that you adjust display's volume to about 80% (using the display's volume control), then adjust the PlayBox volume as described in the steps below.
- Press the System Volume... button from the System Setup screen. The Volume control slider will appear.
- Adjust the volume to your desire. You'll here a dinging sound as you make adjustments so you can gauge the volume output.
- To get finer control, press the Mixer button at the bottom of the slider. The Volume Mixed screen will appear where you can adjust specific application volume.
Note: PlayBox sound is output via the HDMI cable to the display. External USB sound adapters can be used with the PlayBox if HDMI is not an option.
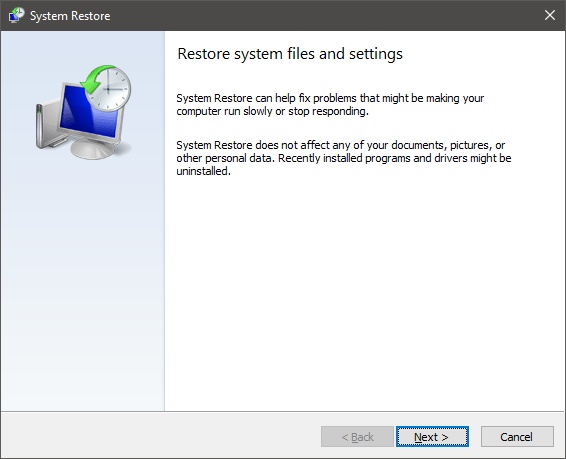
Restore the System
At times, it may be necessary to restore the system to the factory default whereby all PlayBox settings will be reset to the initial setup. Follow the steps below to restore the system:
- Press the System Restore... button from the System Setup screen. The System Restore screen will appear.
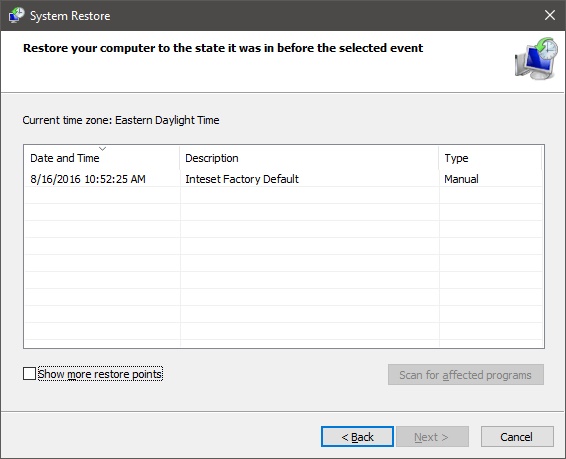
- Press the Next button to view the currently available restore points.
- Select the Inteset Factory Default restore point, then choose Next.
- Confirm the selection then press Finish to begin the restore process.
The restore process will take a couple of minutes, then, the system will restart. Once restarted, the PlayBox will be reset.
Note: This does not restore Chrome setup to the default. To do that, see the Chrome Maintenance topic further down this page.
Note: This does not restore Chrome setup to the default. To do that, see the Chrome Maintenance topic further down this page.
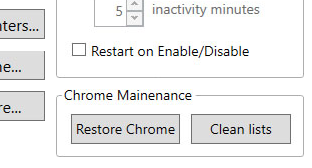
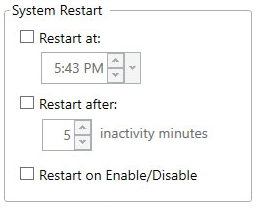
System Restart Settings
If your implementation requires a periodic system restart, the PlayBox provides the ability to restart the system on a daily basis at a specified time. You can also restart the system after a specified period of inactivity. In addition, you can restart the system upon enabling (locking down) or disabling the PlayBox. To activate any of these features, enable the checkbox of the respective feature and specify the associated options for the feature.
Note: If you wish to disable the Ctrl + Alt + Delete screen (where WiFi is configured) upon enabling the PlayBox, be sure to enable the Restart on Enable/Disable checkbox.
Note: If you wish to disable the Ctrl + Alt + Delete screen (where WiFi is configured) upon enabling the PlayBox, be sure to enable the Restart on Enable/Disable checkbox.
Chrome Maintenance
Although Chrome has its own restore (reset) feature in the Settings > Advanced page, the browser tends to leave extraneous elements behind even after running its the option. If you'd like to perform a complete Chrome reset, use the PlayBox Restore Chrome option to do a clean wipe whereby all browser date is removed.
The PlayBox management of Chrome applications and extensions uses a Chrome enterprise feature to retrieve and remove applications and extensions. If you inspect the Chrome Apps or Extension pages, you'll notice a small enterprise icon to the left of the Chrome extension that indicates that it cannot be modified.
The PlayBox management of Chrome applications and extensions uses a Chrome enterprise feature to retrieve and remove applications and extensions. If you inspect the Chrome Apps or Extension pages, you'll notice a small enterprise icon to the left of the Chrome extension that indicates that it cannot be modified.
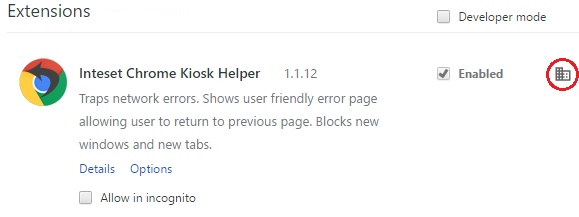
Pressing the PlayBox Clean Lists button will remove any of these apps and extensions that are not registered (saved) within the PlayBox settings (Chrome Settings > Extensions or Chrome Settings > Apps). Saved apps and extensions allow you to transfer those settings from one PlayBox system to another using the Inteset Remote Management Services.
To remove unsaved apps and extensions, press the Clean Lists button.
To remove unsaved apps and extensions, press the Clean Lists button.